|
|
|
Who's Online
There currently are 5993 guests online. |
|
Categories
|
|
Information
|
|
Featured Product
|
|
|
 |
|
|
There are currently no product reviews.
 ;
Very good service Within one day i received a pdf of the users manual and electric circuits so I was able to measure the different voltages in the printed circuit and find out the fault Payment was also reliable and easy.Without the manual i could not have repaired.So thanks to "Search for a manual"
 ;
you are doing great job guys.....my father ask me to find out the schematics of Sony KV25R1D to sort out the problem ..(he was electrical technician, and excperianced with TV and simillar stuff). finally he found the cause and change all necessary parts....now he has got working old dog..and is very happy!!... thank you all.. NB..he also saved the repair cost.
;
Perfect. Received my manual within 24 hours. Clear scan of the manual I needed. No problem.
;
Item as described, very well detailed manual with complete schematics. I've received the download information shortly after payment, very good support.
;
Really good and well scanned. File is complete the full service manual for 5$
3-7-2. Video Memory SIZE/SHIFT/BLKG Adjustments
1. Input the monoscope signal to VIDEO IN. 2. Press the INPUT SELECT VIDEO key to project the monoscope signal on the screen. 3. Select VIDEO MEMORY 1 using the SWITCHER/ VIDEO MEMORY/INDEX changing switch and the SWITCHER/VIDEO MEMORY/INDEX key. 4. Press the RGB SHIFT key and adjust the center of the monoscope signal to the screen center using the �, �, � and � keys. 5. Press the RGB SIZE key and adjust the horizontal and vertical sizes of the monoscope signal to 4:3 using the �, �, � and � keys. 6. Press the BLKG key to adjust the screen top blanking to the position 40 ± 10 mm outside the effective screen using � and � keys. 7. Press the MEMORY key. 8. Store the data of VIDEO MEMORY 1 to VIDEO MEMORY 2 to 5, too. 9. Select VIDEO MEMORY 6. 10. Press the RGB SHIFT key and adjust the center of the monoscope signal to the screen center using the �, �, � and � keys. 11. Press the RGB SIZE key and adjust the horizontal and vertical sizes of the monoscope signal to 4:3 using the �, �, � and � keys. 12. Press the BLKG key to adjust the screen top blanking to the position 40 ± 10 mm outside the effective screen using � and � keys. 13. Store the data of VIDEO MEMORY 6 to VIDEO MEMORY 7_10, too.
3-8. HIGH VOLTAGE SCREEN DISTORTION ADJUSTMENT
1. Select INPUT A and input the fH = 64 kHz RGB stripe signal to the RGB terminals. 2. Press CONTR (+) and BRIGHT (+) to set the contrast and bright levels to the maximum. 3. Adjust RV1 of the EA board so that the left and right vertical lines of the stripes can be straight.
NG
OK
3-9. PROCEDURE AFTER COMPLETING ADJUSTMENTS
After completing all adjustment, change the dip switch S201-1 on the YA board from �OFF (right)� to �ON (left)� to save the adjustment data in the memory.
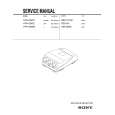
VPH-G90E/G90U/G90M
3-19
|
|
|
> |
|