|
|
|
Who's Online
There currently are 6043 guests online. |
|
Categories
|
|
Information
|
|
Featured Product
|
|
|
 |
|
|
There are currently no product reviews.
 ;
As Always you can find here manuals even of difficult TV scheme which are scan in almost perfect way.clear and fast!!!!!
Great work thanks!
;
Incredibly clear!!!! Well done, complete and wonderful. It could not better than this!!!!
 ;
Thank You for fast delivery for the sheme.
Everything allright.
Thanks & best regards Franz
;
again you did a very good job. It was fast too. Photocopy are really readable and clear
;
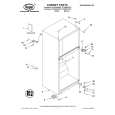
Probably it never existed a 1081 official service manual from Commodore, it's look more like a NAPCEC service manual & diagrams compilation of the 1084 series and his variants, like the nap6523, 8cm505, 1084S, 1084P and obviously the 1081. It's more complete than other scans and the quality of the scans also are far superior. It has two circuit diagrams variants of the 1081, mono and stereo versions. It doesn't include a diagram for the Philips CM8500 or CM8501, they look like the 1081 but they are slightly different.
5. Put the REC MODE switch to the STANDARD 48k (ATF: ON) position and put the REMOTE switch to either the WIRED or WIRELESS position (OFFSET: � or +), then check the RF signal waveform.
Check that there is a difference of 650 ± 15 µsec between the oscilloscope�s SWP signal and the RF signal.
RF
4 A or less 5 NG A
650±15 µsec
SWP
Adjustment Location: See page 26.
4 A� or less 5 NG A'
OK
6. Put the REC MODE switch to the STANDARD 48k (AFT: ON) position and put the REMOTE switch to the OFF position (OFFSET: 0), then check the RF signal waveform. (1) Verify that the peak value (B) of the RF signal waveform is 60mV or more. (2) Verify that the flat position of the RF signal waveform has undershoots of 10% or less.
B or less 10 B or less 10 B
CHECK AND REPLACEMENT FOR DATE FNCTION Clock IC Back-up Check � When replacing the lithium battery (BATT501) or replacing any of the clock IC (IC518) and peripheral parts, the clock will be reset. (The DATE display will be [�-- -- --] [--h--m--s] even when the [PRESENT] button is pushed.) Perform the back-up check by the following procedure. (1) Connect a DC voltmeter between the DIGITAL board�s TP (BATT+) as (+) side on the TP (BATT�) as (�) side. (2) With the POWER switch of the set OFF, check that the voltage (1) is less than +20 mV. (If the measured value is more than +20 mV, inspect the IC518 and peripheral parts and replace as needed.) (3) With the POWER switch of the set ON, check that the voltage (1) is less than 0 mV (minus indication), (If plus indication, inspect the D510 and peripheral parts and replace as needed.) (4) When these voltages are normal, set the clock to the current date and time according to the instruction manual. (year/month/day/day of week/hours/minutes/seconds)* (5) After the clock is set in item (4), turn off the POWER switch once and in several seconds, turn on the power again and make sure that the clock is operating. Adjustment Location: See page 26.
7. If any of the specified values are not satisfied, repeat items 3 to 6. Adjustment Location: See page 23. DPG Adjustment When replacing any drum related parts, be sure to perform this adjustment. Adjustment Method: 1. Connect the CH-1 terminal of an oscilloscope to TP (RF) and the CH-2 terminal to TP (SWP) on the DIGITAL board. 2. Enter the Test Mode 1 (see page 22.) and set the test tape TY7252 (8-909-822-00). 3. Put the REC MODE switch to the STANDARD 48k (ATF: ON) position and put the REMOTE switch to the OFF position (OFFSET: 0). 4. Press the AMS (+) key. 5. Press the PLAY (�) key. 6. �DPG OK� is displayed in the fluorescent indicator tube.
� 25 �
 $4.99 PCMR700 SONY
Owner's Manual Complete owner's manual in digital format. The manual will be available for download as PDF file aft…
|
|
|
> |
|