|
|
|
Who's Online
There currently are 6043 guests online. |
|
Categories
|
|
Information
|
|
Featured Product
|
|
|
 |
|
|
There are currently no product reviews.
 ;
Je suis audiophile belge, électronicien et créateur d'enceintes acoustiques.
J'ai apprécié la qualité des documents fournis. Ils sont très lisibles, ils peuvent être agrandis sans problème et ils sont complets. Pour moi, c'est parfait. Pour cette qualité, je suis d'accord de payer. Et le système de paiement et d'envoi est simple. Merci, continuez comme cela.
Frédéric
;
The cover page was a little scary, very dark but readable. The remainder of the document was better copy and easily readable. Why would I give 5 Stars? (1) PRICE, (2) AUTHENTICITY, It was the real deal, filled with service information, including the specific information I required. (3) PRIVACY, I didn't start to get slammed with spam. (4) EASY TRANSACTION. Painless. (5) COMPLETE, I have found several manuals here, that I could find nowhere else. (6) I will be a repeat customer!
;
Well done!!! I found what I need to have, indeed!
Furthermore, due to my hobby is repairing vintage equipments, I added this web site in my desk toolbar because I have in mind to search further service manuals. Thanks a lot www.owner-manuals.com !
Regards, Maurizio
;
Again very good service manual, this time very fast download. AAAAA+
;
Ckear manual, well reproduced with plenty of overlap on critical pages.
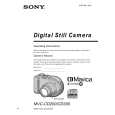
Setting the date and time
When you first use your camera, set the date and time. If these are not set, the CLOCK SET screen appears whenever you turn on your camera.
5
Set the numeric value with v/V on the control button, then press the center z to enter it. After entering the number, v/V moves to the next item. If you selected [D/M/Y] in step 3, set the time on a 24-hour cycle. Select [OK] with B on the control button, then press the center z at the desired moment to begin clock movement. The date and time are entered.
CLOCK SET 2001 / 7 / 1
OK
Y/M/D M/D/Y D/M/Y 12 : 00
AM
OK
CANCEL
1 2
POWER ON/OFF (CHG) lamp
6
CLOCK SET
Y/M/D
M/D/Y D/M/Y 10 : 30
PM
2001 / 7 / 4
OK CANCEL
3�6
OK
To cancel the date and time setting Select [CANCEL] with v/V/b/B on the control button, then press the center z.
1 2
Set the mode dial to
, S, A, M,
, SCN, or
.
Push the POWER switch in the arrow direction to turn on the power. The POWER ON/OFF (CHG) lamp (green) lights up. The CLOCK SET screen appears. When resetting the date and time once you set, set the mode dial to SET UP (page 84), and then follow the procedure from step 3. Select the desired date display format with v/V on the control button, then press the center z. Select from [Y/M/D] (year/month/day), [M/D/Y] (month/day/year), or [D/M/Y] (day/month/year).
3
CLOCK SET 2001 / 1 / 1 12 : 00
Y/M/D M/D/Y D/M/Y
AM
OK
CANCEL
OK
4
Select the year, month, day, hour or minute item you want to set with b/B on the control button. The item to be set is indicated with v/V.
CLOCK SET
Y/M/D M/D/Y D/M/Y 12 : 00
AM
2001 / 1 / 1
OK CANCEL
OK
14
15
Inserting a disc
You can use only the 8 cm CD-Rs or 8 cm CD-RWs that have these marks.
Removing the disc While sliding the lock tab to the left, slide down the disc cover OPEN lever, and open the disc cover after the cover is unlocked. Then, remove the disc as illustrated below.
1
Disc cover OPEN lever Lock tab
2
Getting started Getting started
Notes
� Before removing the disc, be sure to check that the disc is not rotating. � Do not open the disc cover while the ACCESS lamp is lit. If you do, the recorded image may be damaged or the disc may become unusable. � When writing data on a disc or connecting with a computer using the USB connection, the disc cover OPEN lever is locked.
1 2
While sliding the lock tab to the left, slide down the disc cover OPEN lever. Open the disc cover by your hand after the cover is unlocked. Place a disc with the printed side up. Push down the center of the disc until it clicks. When installing, do not push with too much force and do not touch the pickup lens.
Pickup lens
Push here Disc
3
Close the disc cover.
16
17
1-3
|
|
|
> |
|