|
|
|
Who's Online
There currently are 5756 guests online. |
|
Categories
|
|
Information
|
|
Featured Product
|
|
|
 |
|
|
There are currently no product reviews.
 ;
I purchased the unit from a private party and the original owners manual was not available. Having the ability to download it was extremely helpful and clarified operating the equipment immensely. This is a complicated unit and without the manual I would not have been able to maximize it's potential. Thank you.
;
Being a user of older radios of many kinds, preferring them over more modern rigs, this manual was invaluable in the programming of my two. I now know for certain what the assorted buttons functions are, and am very grateful to have found this excellent site. Many thanks for your assistance, Tony.
 ;
Clear and easy to read. All details as expected. Price acceptable , and quick delivery.
;
Quick response and exactly what I was looking for and at a great fair price!
;
5 star quality on these downloadable manuals. Easy to read and all the information is there. A must when doing a custom install or needing to service your precious old school electronics.
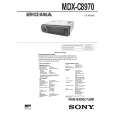
SECTION 3 ELECTRICAL ADJUSTMENTS
TEST MODE This set have the test mode function. In the test mode, FM Auto Scan/Stop Level and AM Auto Scan/Stop Level adjustments can be performed easier than it in ordinary procedure. <Set the Test Mode> 1. Turn ON the regulated power supply. (All LEDs on the set lights up, and the clock is displayed.)
TUNER SECTION
0 dB=1 µV
Cautions during repair When the tuner unit is defective, replace it by a new one because its internal block is difficult to repair.
Note: Adjust the tuner section in the sequence shown below.
[OFF] button, if the clock is not displayed. 2. Push the preset [4] button. 3. Push the preset [5] button. 4. Press the preset [1] button for more than two seconds.
5. Then the display indicates all lights, the test mode is set. <Release the Test mode> 1. Push the [OFF] button. See the adjustment location from on page 17 for the adjustment.
Note: Press the
1. FM Auto Scan/Stop Level Adjustment 2. FM Stereo Separation Adjustment (Wide)
3. FM Stereo Separation Adjustment (Narrow) 4. AM Auto Scan/Stop Level Adjustment FM Auto Scan/Stop Level Adjustment Setting:
[SOURCE] button : FM
FM RF signal generator
antenna jack (CN101) 0.01 µF
MD SECTION
MD section adjustments are done automatically in this set.
Carrier frequency Output level Mode Modulation
set : 98.00 MHz : 22 dB (12.6 µV) : mono : 1 kHz, 22.5 kHz deviation (30%)
Procedure: 1. Set to the test mode. 2. Push the [SOURCE] button and set to FM. Display
SHUF
3. Adjust the volume RV2 on TU101 by turning clockwise untill �0� is shown next to �FM� on the display window, If �0� is already shown or the volume RV2 has been turned too far, turn it back counterclockwise untill �0� is disappeared once, then try this adjustment. Display
SHUF
Adjustment Location: See page 17.
15
|
|
|
> |
|