|
|
|
Who's Online
There currently are 5782 guests online. |
|
Categories
|
|
Information
|
|
Featured Product
|
|
|
 |
|
|
There are currently no product reviews.
 ;
Good pdf of the service manual for this unit. Includes disassembly instructions, full schematics, board layouts, parts lists and diagnostic information. Some information is in the pdf twice (single pages, and split pages), but that could be how it was originally generated by panasonic, or perhaps the idea is to make it eaiser to put onto 8.5 x 11" pages.
Information was exactly what I needed. Delivery was overnight (less than 12 hours) and I was happy with the process.
;
5 STARS for FAST DELIVERY, BEST PRICES and QUALITY PRODUCT. Item was exactly as described with superb resolution. Will definitely source all my future requirements from this website. Thanks a lot owner-manual.com!
;
OEM manual provided all schematics, board layouts and component specs necessary to facilitate unit maintenance. All pages were clear and readable.
;
Good condition and quality. Hard to find anywhere in Internet, only on this site.
 ;
Exactly what I needed to be able to bring the amp back to life... will come back to this site the next time I need schematics.
KV-32V68/35V68
2-5. PICTURE TUBE REMOVAL
WARNING -- Before removing anode-cap:
High voltage remains in the CRT even after the power is disconnected. To avoid electrical shock, discharge CRT before attempting to remove the anodecap. Short between anode and coated earth ground strap of CRT. Picture tube shield assy C board
Four screws (Tapping screw 7)
G board Chassis
Neck assy Deflection yoke
K board
Picture tube Anode-cap Coated earth ground strap Cushion
ANODE-CAP REMOVAL
WARNING: High voltage remains in the CRT even after the power is disconnected. To avoid electrical shock, discharge CRT before attempting to remove the anode-cap. Short between anode and coated earth ground strap of CRT. NOTE: After removing the anode, short circuit the anode of the picture tube and the anode cap to either the metal chassis, CRT shield, or carbon painted on the CRT.
REMOVAL PROCEDURES
Turn up one side of the rubber cap in the direction indicated by arrow .
Use your thumb to pull the rubber cap firmly in the direction indicated by arrow .
HOW TO HANDLE AN ANODE-CAP
Do not use sharp objects which may cause damage to the surface of the anode-cap. Do not squeeze the rubber covering too hard to avoid damaging the anode-cap. A material fitting called a shatter-hook terminal is built into the rubber. Do not force turn the foot of the rubber cover. This may cause the shatter-hook terminal to protrude and damage the rubber.
When one side of the rubber cap separates from the anode button, the anodecap can be removed by turning the rubber cap and pulling it in the direction of arrow .
� 16 �
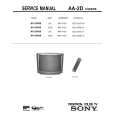 $4.99 KV35V68 SONY
Owner's Manual Complete owner's manual in digital format. The manual will be available for download as PDF file aft…
|
|
|
> |
|