|
|
|
Who's Online
There currently are 6038 guests online. |
|
Categories
|
|
Information
|
|
Featured Product
|
|
|
 |
|
|
There are currently no product reviews.
 ;
Very good conversation, Pretty fast Service, wood do it again,
Have paid by Paypal, so i got the Service Manual online after 15 Min.
Very helpfully.
Greeting from Germany,
Hans
;
Good-quality scans. Detailed description. I hope I can repair the machine.
;
High-quality scanning. Detailed description. Recommend for all technician. A+++
;
This is a good quality scan of the original Service Manual from Nordmende, Germany. Contains the circuit diagram, PCB layout, adjust/tune instructions as well. It is NOT in English but in GERMAN language! That was quite right for my german friend from the lower east side in Berlin.
 ;
Received via e-mail this PDF manual is worth the money. This is a quality scan of a manual in excellent condition and is just as good as having the original manual in hand. I have later seen the original manual and it was printed in colour, but this particular manual is black & white but scan resolution is high end quality! All drawings and pictures are presented in great detail. So, nearly perfect score in my opinion.
If you own the turntable you also should own the manual!
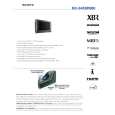
KD-30XS955/34XBR960/34XS955/36XS955
SECTION 2: SET-UP ADJUSTMENTS
The following adjustments should be made when a complete realignment is required or a new picture tube is installed. These adjustments should be performed with rated power supply voltage unless otherwise noted. The controls and switch should be set as follows unless otherwise noted: VIDEO MODE: STANDARD (RESET) Perform the adjustments in order as follows: 1. Beam Landing 2. Convergence 3. Focus 4. Screen (G2) 5. White Balance Test Equipment Required: 1. 2. 3. 4. Color Bar Pattern Generator Degausser DC Power Supply Digital Multimeter
� 2-1.
BEAM LANDING
Preparation: � Use cross hatch signal to rough adjust focus, G2 and then input a white pattern signal. � Face the picture tube in an East or West direction to reduce the in�uence of geomagnetism. � Remove all magnets, wedges, and permalogy strips. � Con�rm data in service mode to match with CRT screen size. � Set 2170D-1 to their default settings. � VCEN 19 � VPIN 15 � HTPZ 15 � Set 2170D-2 to their default settings. � PPHA 21 � VANG 31 � LANG 31 � VBOW 31 � LBOW 31 � Set 2170D-4 to their default settings. � CXA8070 to their default settings. � Set all user compensations to their default settings. � Set landings to their default settings. � LT Left Top LCC Control 127 � � LB Left Bottom LCC Control RT Right Top LCC Control 127 127
1. Input white pattern from pattern generator. Set the PICTURE control to maximum, and the BRIGHTNESS control to standard. 2. Loosen the de�ection yoke mounting screw, and set the purity control to the center as shown below:
Purity Control
3. Input a green pattern from the pattern generator. 4. Move the de�ection yoke backwards, (See Figure 1) and adjust with the purity control so that green is in the center and red and blue are even on both sides.
Blue
Red
Green
� RB Right Bottom LCC Control 127 NOTE: Do not use the hand degausser; it magnetizes the CRT . 5. Move the de�ection yoke forward, and adjust so that the entire screen becomes green.
Figure 1
KD-30XS955/34XBR960/34XS955/36XS955
34
|
|
|
> |
|