|
|
|
Who's Online
There currently are 5874 guests online. |
|
Categories
|
|
Information
|
|
Featured Product
|
|
|
 |
|
|
There are currently no product reviews.
 ;
Having bought a pre-owned Sony FM stereo tuner through eBay, it came without any manuals. It soon became clear that to get the best from this excellent tuner I needed a decent manual because much of the operation was not intuitive to a newboy to hi fi like me. I managed to download the official Sony multi-lingual manual from Owner-Manuals.com with no problem at all - a really quick and easy service. I'm very glad I did because I found out all the operations of the tuner and was then able to not only set it up quickly but also to get much more from it that poke-and-hope trialling would ever achieve. In my book $4.99 very well spent.
;
This manual is immaculate in it's accuracy. Everything is written very clearly and easy to understand. Written by a professional who wants to convey a clear and easy to understand message!!
;
This Manual (as downloaded) is both informative and comprehensive and has proved to be extremely useful. thoroughly recommended.
;
everything is ok, thank you very much! Product is good, no problems with download!
;
Great site, I always find all the manuals I need and i can't find anywhere else. PDF for the Sony PCM 3348 is complete and scan is good quality. Thank you!
English
Français
A
To Charge the Battery Pack
See illustration A.
You can charge the battery pack installed in the video equipment by connecting the car battery adaptor. For details of the battery pack installation and charging time, refer to the operating instructions supplied with the video equipment. Make sure that the battery pack installed in the video equipment may not be charged depending on video equipments.
Pour charger la batterie
Voir illustration A.
La batterie rattachée à l�appareil vidéo peut être rechargée en raccordant l�adaptateur allume-cigare. Pour les détails sur l�installation et le temps de recharge de la batterie, se reporter au mode d�emploi fourni avec l�appareil vidéo. La batterie rechargeable risque de ne pas être rechargée avec certains appareils vidéo.
1
a
1 2 3
Connect the car battery cord to the cigarette lighter socket.
The POWER lamp a (green) lights up.
1 2 3
Brancher le cordon allume-cigare sur la douille de l�allumecigare.
Le témoin POWER a (vert) s�allume.
Connect the supplied DK-215 connecting cord b to the DC OUT connector of this unit. Connect the connecting cord to the DC input jack of the video equipment.
If your video equipment is CCD-TRV95, etc, open the DC IN jack cover and connect the connecting cord to the DC IN jack.
Brancher le cordon de liaison DK-215 b fourni sur le
connecteur DC OUT du chargeur. Brancher le cordon de liaison sur la prise d�entrée DC de l�appareil vidéo.
Si l�appareil vidéo est un CCD-TRV95, etc. ouvrir le cache-prise DC IN et brancher le cordon de liaison sur la prise DC IN.
2
4
Attach the battery pack to the video equipment and leave the power of the video equipment off.
Charging of the battery pack installed in the video equipment begins.
4
Fixer la batterie rechargeable à l�appareil vidéo et laisser l�appareil hors tension.
La recharge de la batterie rattachée à l�appareil vidéo commence.
Note
If you operate the video equipment during charging, this unit stops charging. To resume charging, turn off the power of the video equipment.
Remarque
Si l�appareil vidéo est mis en marche pendant la recharge, la recharge s�arrêtera. Pour poursuivre la recharge, éteindre l�appareil vidéo.
4
To Operate Video Equipment
See illustration B.
Utilisation de l�appareil vidéo
1 Voir illustration B. Brancher le cordon allume-cigare sur la douille de l�allumecigare.
Le témoin POWER a (vert) s�allume.
3
1 2
The POWER lamp a (green) lights up.
Connect the car battery cord to the cigarette lighter socket.
Connect the supplied DK-215 connecting cord b to the DC OUT connector of this unit. 2 3
3
b
Connect the connecting cord to the DC input jack of the video equipment.
If your video equipment is CCD-TRV95, etc, open the DC IN jack cover and connect the connecting cord to the DC IN jack. This unit supplies the power to the video equipment and you can operate it.
Brancher le cordon de liaison DK-215 b fourni sur le connecteur DC OUT du chargeur. Brancher le cordon de liaison sur la prise d�entrée DC de l�appareil vidéo.
Si l�appareil vidéo est un CCD-TRV95, etc. ouvrir le cache-prise DC IN et brancher le cordon de liaison sur la prise DC IN. Le chargeur alimente l�appareil vidéo qui peut fonctionner ainsi.
Note
Keep this unit away from the video equipment if the picture is disturbed.
Remarque
Eloigner le chargeur de l�appareil vidéo si l�image est parasitée.
B
Fuse Replacement
See illustration C.
If this unit is not working properly, check to see if the fuse has blown out. If the fuse has blown out, replace it in the following way.
Remplacement du fusible
Voir l�illustration C.
Si l�appareil ne fonctionne pas correctement, vérifier si le fusible n�a pas sauté. Si le fusible a sauté, le remplacer de la manière suivante.
1
a
1 2 3
Twist the end of the plug and remove it. Remove the blown out fuse.
1 2 3
Dévisser l�extrémité de la fiche et l�enlever. Enlever le fusible. Installer un nouveau fusible, visser l�extrémité de la fiche et la serrer.
Insert the new fuse and twist the end of the plug and tighten.
Notes
� If the car's cigarette lighter socket is dirty with ash, etc., the plug part will become hot due to a poor connection. Be sure to clean it before using. � When replacing the fuse, do not substitute anything for the specified fuse. � If the fuse blows again soon after replacement, consult your nearest Sony dealer. Please contact your car dealer about the polarity that your car is grounded or the voltage of your car battery, etc.
Remarques
� Si la douille de l�allume-cigare de la voiture est recouverte de cendres ou autre, la fiche risque de chauffer a cause d�un mauvais contact. Veiller à nettoyer la douille. � Remplacer le fusible uniquement par le fusible spécifié. � Si le fusible saute juste après avoir été remplacé, consulter votre revendeur Sony. En ce qui concerne la polarité de la masse de la voiture, la tension de la batterie de voiture ou autre, consulter votre concessionnaire auto.
2
3
b
C
1 2
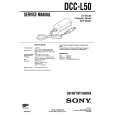 $4.99 DCC-L50 SONY
Service Manual Complete service manual in digital format (PDF File). Service manuals usually contains circuit diagr…
|
|
|
> |
|