|
|
|
Who's Online
There currently are 5905 guests online. |
|
Categories
|
|
Information
|
|
Featured Product
|
|
|
 |
|
|
There are currently no product reviews.
 ;
Please tell us what you think and share your opinions with others. Be sure to focus your comments on the product. You will receive $2.00 of store credit for Your review.
;
Please tell us what you think and share your opinions with others. Be sure to focus your comments on the product. You will receive $2.00 of store credit for Your review.
;
Good copy and great customer service! There was some confusion with my order and it was resolved promptly!
;
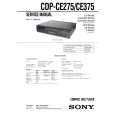
Having bought a pre-owned Sony FM stereo tuner through eBay, it came without any manuals. It soon became clear that to get the best from this excellent tuner I needed a decent manual because much of the operation was not intuitive to a newboy to hi fi like me. I managed to download the official Sony multi-lingual manual from Owner-Manuals.com with no problem at all - a really quick and easy service. I'm very glad I did because I found out all the operations of the tuner and was then able to not only set it up quickly but also to get much more from it that poke-and-hope trialling would ever achieve. In my book $4.99 very well spent.
;
This manual is immaculate in it's accuracy. Everything is written very clearly and easy to understand. Written by a professional who wants to convey a clear and easy to understand message!!
Playing CDs Making digital hookups
If you have a digital component such as a digital amplifier, D/A converter, DAT, or MD, connect the component via the DIGITAL OUT (OPTICAL) connector using the optical cable (not supplied). Take off the cap and plug in the optical cable. Note that you cannot use the following functions when making this connection: � Fading In or Out (see page 12) � Adjusting the output level using the ANALOG OUT LEVEL +/� buttons on the remote
POC-15 Optical cable (not supplied) CD player Digital component
Loading a CD
1 Turn on the amplifier and select the CD
player position so that you can listen to the sound from this player.
Getting Started Playing CDs
2 Press POWER to turn on the player. 3 Press AOPEN/CLOSE.
The disc compartment slides out.
4 Place a disc on the disc tray with the
label side up.
DIGITAL
OUT OPTICAL
DIGITAL INPUT
Disc number When you play a CD single, place it on the inner circle of the tray.
OPTICAL
5 To place other discs, press DISC SKIP
and place the discs in the order you want to play.
Note
When you connect via the DIGITAL OUT (OPTICAL) connector, noise may occur when you play CD software other than music, such as a CDROM.
Each time you press the button, the disc tray turns and you can place the discs in the empty disc compartments. The player plays the disc in front of you first.
Transporting the player
Before transporting the player, follow the procedure below to return the internal mechanisms back to their original position.
6 Press AOPEN/CLOSE to close the disc
compartment.
1 Remove all the discs from the disc tray. 2 Press A OPEN/CLOSE to close the
disc tray.
�no dISC� appears in the display.
3 Wait for 10 seconds, then press
POWER to turn off the player.
7
|
|
|
> |
|